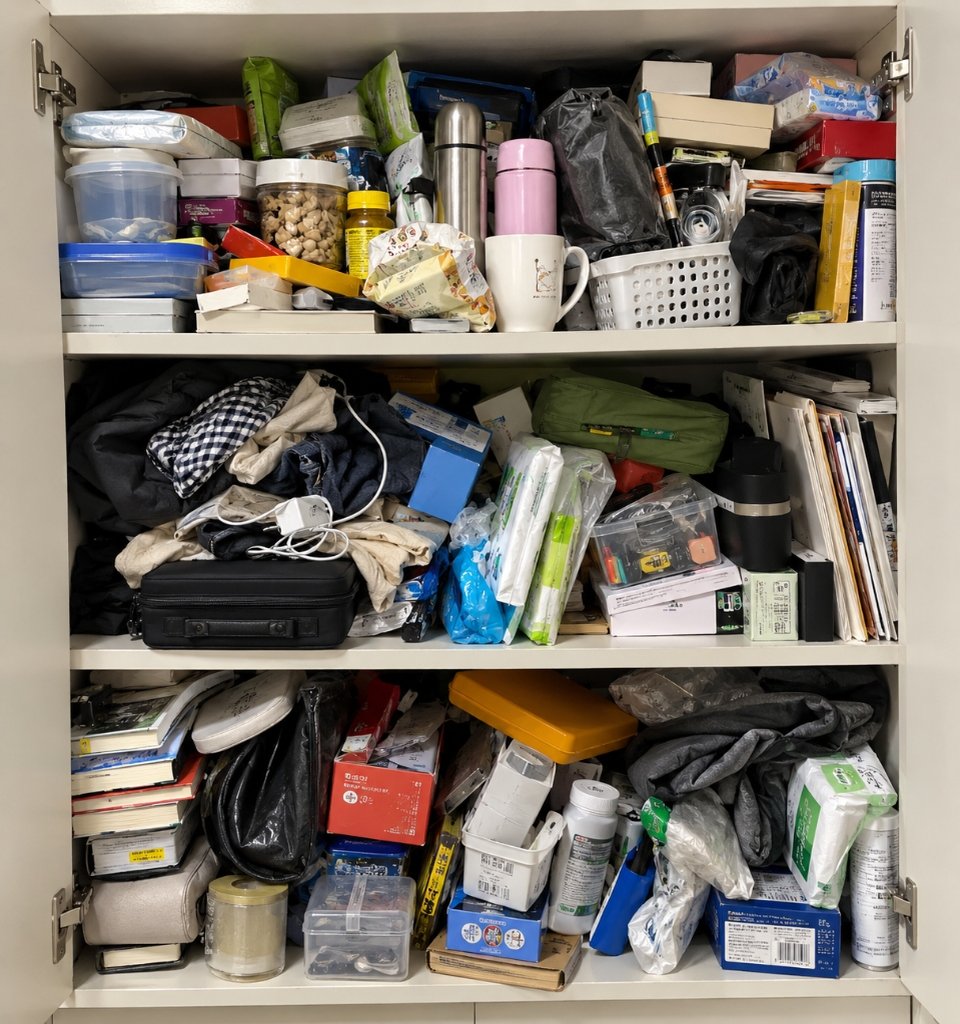
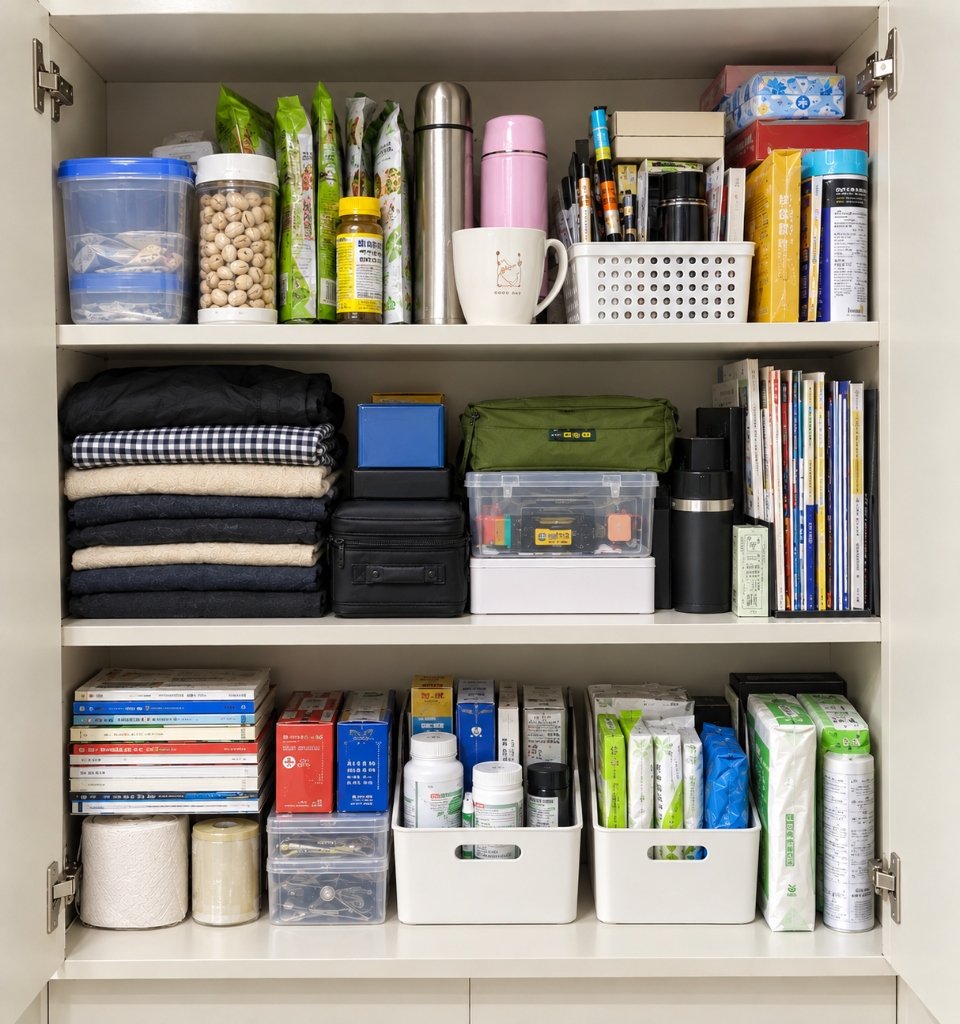


Why pantries fall apart in three weeks
Almost nobody's pantry was ever messy on purpose. It gets messy because food arrives faster than it gets put away, and because "put away" has no definition in most kitchens. A bag of rice goes on whatever shelf has a gap. A second bag of rice arrives two weeks later and goes on the floor, because the shelf is full of the first one buried behind a jar someone bought in March.
So the fix is not tidying. Tidying is moving things around until the next shop. The fix is giving every category a height and a place, which is what the six steps below do, in the order that works.
Two hours is the budget for a reach-in pantry, three for a walk-in. If a plan needs longer than that on a first pass, it is the wrong plan — you will not finish it, and a half-finished pantry is worse than a tidy messy one, because now the floor is covered too.
Step 1: Empty it completely, and clean while it is empty
Take everything out. Every can, every box, the goodie bag from the Easter holiday, the bag of chips you have been meaning to throw away since June. Put it on the kitchen table or the floor in front of the pantry, not "temporarily back on the shelf".
A shelf that is half full cannot be assessed, because you are planning around things you cannot see, and the blind spots are exactly where the problems are.
Then wipe the shelves. Take a bin bag and a spray bottle with you into the pantry, wipe the dust and the spill residue, and leave the door open while you work. This is also the step where you check the corners for the webbing and tiny larvae that mean pantry moths, and where you notice that the shelf above the sink has been swelling at the edge for a year.
Time: 25 minutes. Do not skip it and do not negotiate it down. Everything after this step is a faster, easier decision because the shelf is bare.
Step 2: Sort into four piles before you buy anything
Make four piles on the floor:
- Daily — you touch it at least five times a week. Coffee, oils, salt, the cereal everyone eats, the snacks your kids actually open, the lunchbox things.
- Occasional — baking day, Sunday roast, the bulk paper you restock monthly, the slow cooker ingredients.
- Toss — anything past a date, anything with a compromised seal, anything whose contents you cannot name, and every open packet of something you bought more than a month ago.
- Does not belong here — cleaning spray, pet food, foil and bin bags, small appliances, the case of bottled water. These are kitchen items, but not pantry items.
Only when those four piles exist do you decide what needs buying. Containers are a step 4 purchase, never a step 2 purchase. This is the single most expensive mistake in pantry organization: a full set of beautiful airtight canisters arrives, the shelf is organized into them once, and six weeks later they are holding loose packets again, because the layout was never decided.
What to throw out of a pantry
The honest rule for a first clean-out:
- Toss: anything with no identifiable contents, anything with a broken or bulging can, anything with moth webbing, open packets of flour, rice, grain or spices older than three months, and anything you cannot remember buying.
- Use first, then decide: cans past their best-before date are usually still safe — the date is about quality. Move them to the front and eat them this month, then judge.
- Keep without guilt: unopened staples within date, and anything you have genuinely eaten in the last six months. If it has not been touched in six months, it will not be.
Do not try to rescue every jar. A plan built on guilt does not survive contact with a grocery delivery.
Step 3: Zone by frequency, not by food group
The most common organizing instinct is to group by category: all the baking together, all the cans together, all the snacks together. It looks tidy for four days and then collapses, because it ignores how often you actually reach for something. Categorized pantries put the flour — used once a month — on the shelf at eye level, and the cereal — used every day — on the top shelf behind it.
Organise by how often your hand needs to go there, and there are only three heights that matter:
| Shelf height | What lives there | Examples |
|---|---|---|
| Eye to hip — the golden zone | Every day | Breakfast, snacks, coffee, oils, salt, the pan you use |
| Above eye, and the bottom shelf | Weekly to monthly | Baking, canned goods you rotate, bulk paper, appliances, party supplies |
| Floor | Heavy and rarely moved | Small appliances, case goods, the slow cooker, anything you carry with two hands |
Within the golden zone, order by the shape of your day: breakfast on the left if that is the first thing you make, dinner basics on the right.
If there are children in the house, give them one low shelf with an open-front basket of the snacks they are allowed to take themselves. It is the fastest way to stop the 4pm negotiation, and it moves the treats off the eye-level shelf where you would rather they were not.
Step 4: Contain the things you refill, not the things you own
Containers earn their cost in exactly one situation: a staple you run out of and re-buy, that you can see the level of. Flour, sugar, rice, pasta, cereal, oats, coffee, loose spices. That is usually five to eight containers, not twenty.
Two rules that make the difference between a functional and a decorative result:
- Square, not round. Round canisters leave curved gaps that eat roughly a third of a shelf line. Square ones tile, and the shelf holds noticeably more at the same footprint.
- Leave the rest in the packet. Original packaging carries the barcode, the cooking instructions, the weights, and the best-before date. Decanting into an unlabelled jar destroys all four and creates a shelf of mystery. If a container does not get refilled reliably, it is a prop.
For everything else, a basket per category beats a container per item. One bin for "school snacks", one for "tinned tomatoes and pasta sauces", one for "spices". Four decisions on a shelf read as tidy; forty individual items read as chaos even when every one is in its place.
The cheapest useful purchases, in order of how much they fix: an expanding shelf riser (doubles a level by stacking short items over tall ones), a lazy Susan for the oils and sauces cluster, four to six matching square containers, a label maker or a roll of masking tape and a pen.
Step 5: Label as you finish, never later
A label is not decoration. It is the thing that makes a returned item go back to the right place when nobody is thinking about it, which is every time after the first week.
Label the bins and the containers. Then write the open date on the five things you open constantly — the flour, the rice, the coffee, the nuts, the jar of sauce. Open date, not buy date: the packet is what matters once the seal is broken.
You do not need a label maker. Masking tape and a biro looks intentional in a pantry and costs nothing. What matters is that the label is on the front edge, facing out, at the same height on every shelf, so a scan of the room answers your question without a search.
Step 6: Leave a hand width of empty shelf
This one is counterintuitive and it is what makes the system survive.
A shelf packed edge to edge cannot be restocked. The new groceries have nowhere to go except the bag, then the counter, then the floor — and that is the mess back. Leave roughly one hand width of clear shelf at the end of each level, and every shop has somewhere to land before it gets a home.
The same applies to the door back and the vertical gaps: before you buy another container, look at the eighteen inches of unused air above the cereal boxes and the inside of the door. Most pantries are not short on space. They are short on height usage.
Small, deep and walk-in pantries
The method is identical; the constraint changes.
A small pantry has no room for a second row of anything. Everything gets one deep, single row, front-facing, and the tallest items go on the narrowest shelf. Use the door and the risers; do not put bins in a small pantry, because a bin is a permanent reservation on a shelf you cannot afford.
A deep pantry — the kind where the back wall is three feet away — fails in one specific way: the back row dies. Use pull-out trays or baskets with handles so the back comes to you. Otherwise the rule is short items in front, tall items behind, and nothing at the back that has a date on it.
A walk-in is a room, and it should be planned like one: the wall you face when you enter is the golden zone, the deep back wall is bulk and appliances, and one shelf gets dedicated to a single-task drop zone (lunchbox, snacks, the coffee things) so you are never crossing the room twice.
A rented kitchen with shelving you cannot drill is fine: risers, tension rods, baskets on wire shelf and freestanding units do most of the work without a single hole.
Renters, weird shelving and no cupboard at all
Builder-grade wire shelving is a bad pantry: everything slides, small things fall through and nothing has a back. Cheap fix, in order: a plastic bin liner or a cut piece of cardboard under each level to stop things falling through, one basket per category, and canned goods in a tray rather than loose on the wire.
If you have no pantry at all, the answer is usually a freestanding shelving unit in the corner, or the top of the fridge for anything you never cook with. A rolling cart beside the oven beats a shelf at the far end of the kitchen, because it lives where the cooking happens.
Keeping it organized after week one
- Two minutes after every shop. New things go to their zone, not to the counter. Oldest can moves to the front.
- One shelf a month. Not the whole pantry. Whatever shelf looks worst when you walk past it.
- A standing "eat me first" basket in the golden zone for anything open or nearing a date. It gets emptied on Tuesday, every Tuesday.
- A bin for the mystery drawer — the packet of chopsticks, the three rubber bands, the birthday candle. A place for the unclassifiable is better than a shelf that slowly becomes it.
If you find yourself re-doing the whole thing more than twice a year, the layout is wrong for how you actually cook — not the other way round.
How long does organizing a pantry take?
| Pantry | First pass | Restocking shop |
|---|---|---|
| Reach-in closet, 4 shelves | 60–90 minutes | 5 minutes |
| Walk-in, 5–6 shelves | 2–3 hours | 10 minutes |
| Cabinet or shelving unit | 30–45 minutes | 3 minutes |
| Fridge + pantry together | add 45 minutes | — |
The first pass includes the clean-out and the wipe down. The number that keeps a pantry working is the second column: if a restock takes more than five minutes, the zones are too detailed.
Do I need to buy containers?
No, not for the first pass. Every step above is free except the containers in step 4, and those only pay for themselves for the handful of staples you actually refill.
Pick the under-$50 approach and the plan is built from moves and repurposing: your existing jars, a cardboard box as a bin, tape as a label. Pick the clear-container approach and the same layout is done with a matching set, which costs more and holds its shape better in a house where more than one person restocks.
If you want the version for your exact shelves — the item count, the real shelf heights, and a picture of what it should look like finished — the tool at the top of this page does it from one photo.